The Interactive Map Search lets you search for listings based on their location on a map.
Map Location Search: Search for an address, location, or listing number using the integrated location search in the map toolbar.

Moving the Map: Zoom in or out by placing your cursor over the map and using your mouse's scroll wheel, or by clicking the plus or minus symbols located on the bottom-right corner of the map.
Move the map in any direction by clicking and dragging a section of the map to your desired location.
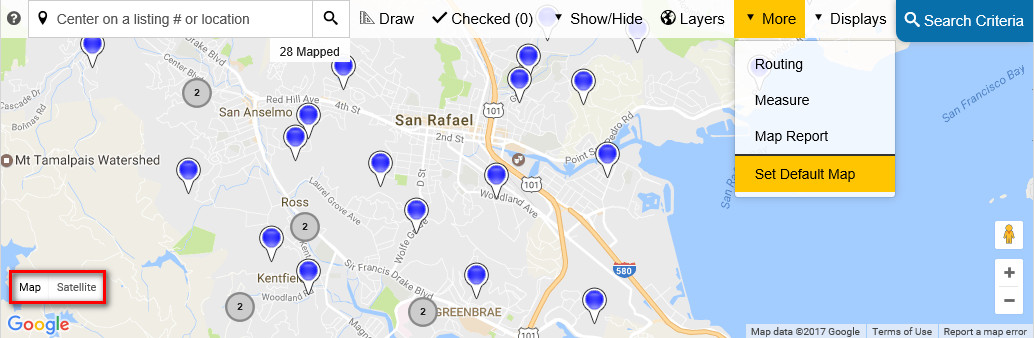
Map Views: Switch between the Road, Satellite, Hybrid, and Terrain views using the view buttons in the lower-left corner of the map. To use Google Street View, click a listing pin to open the map tooltip and then click the “Street” button.
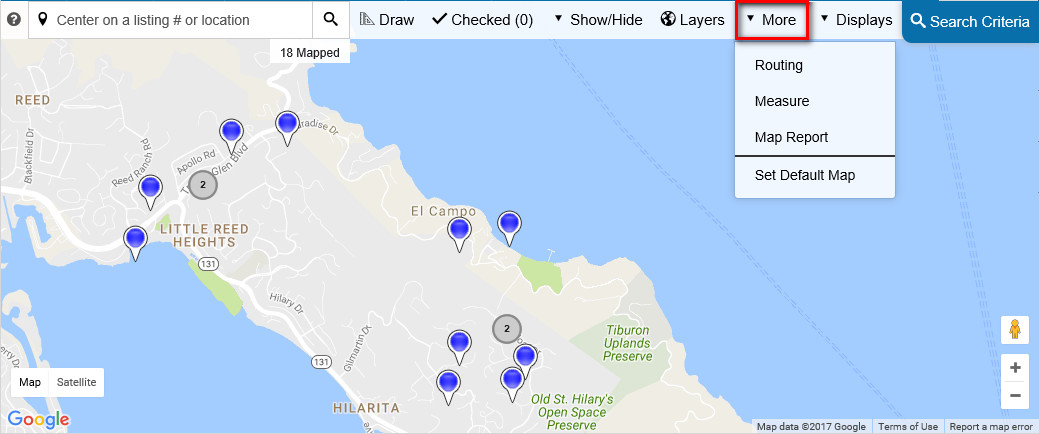
Set Default Map: Click the “Set Default Map" option in the “More” drop-down menu to save the current map location as your preferred default location.
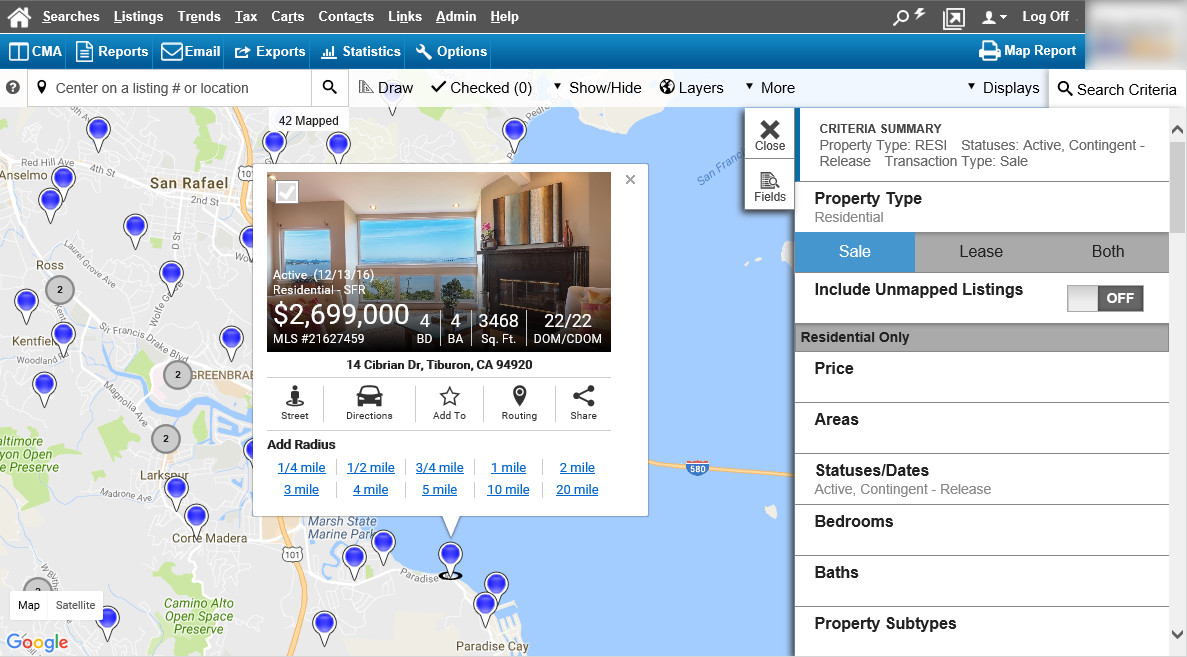
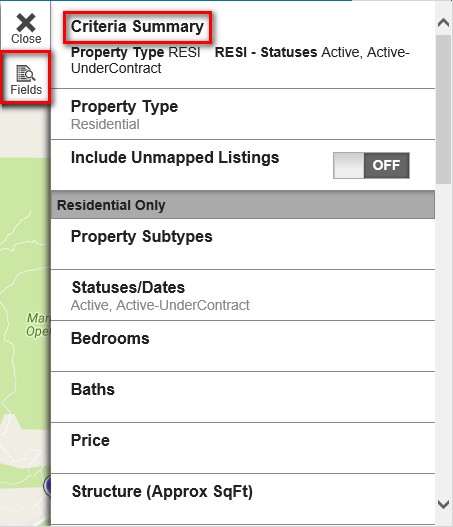
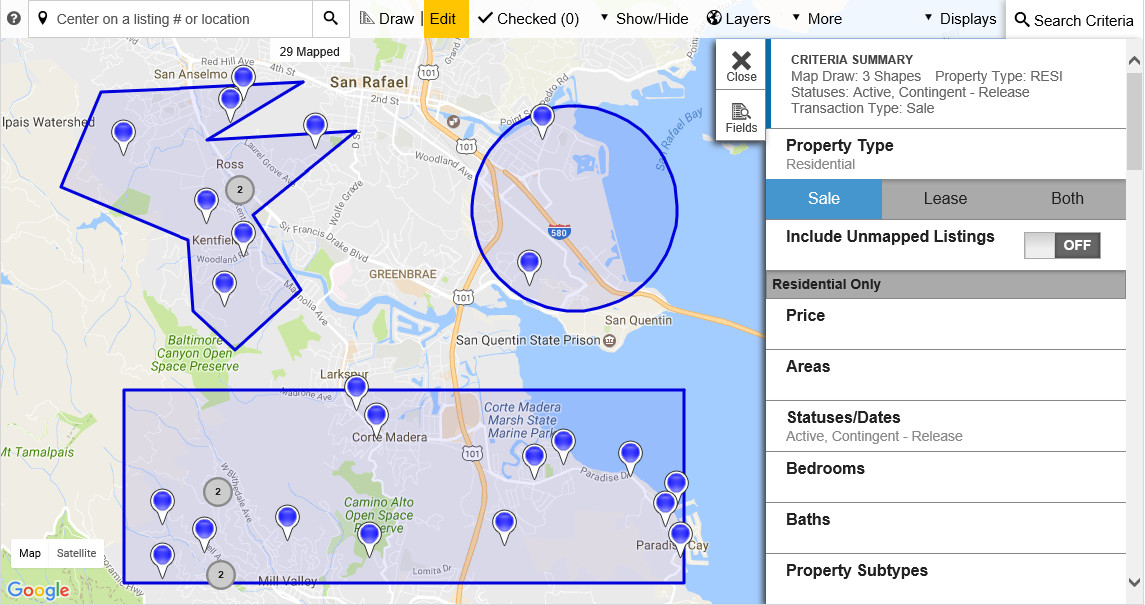
Search Criteria Panel: Located on the right side of the map is the Search Criteria panel. You can update search criteria and the map will automatically update with matching results on the fly.
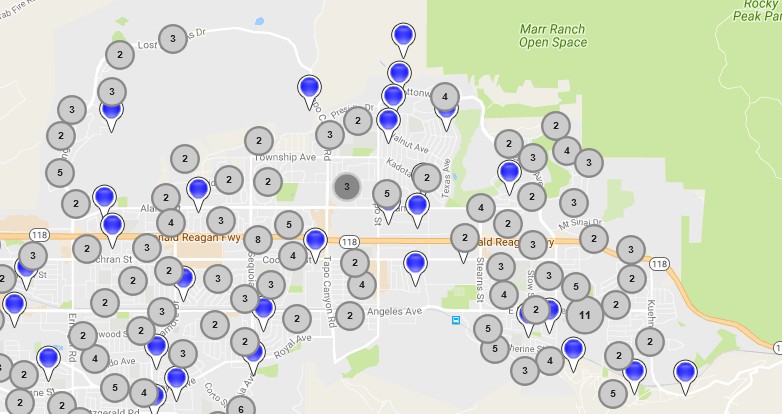
Map Pin Grouping: Based on the current zoom level, listings clustered close together will display as a numbered pin indicating the number of listings in the group. Click the numbered icon to zoom in and view the individual listings.
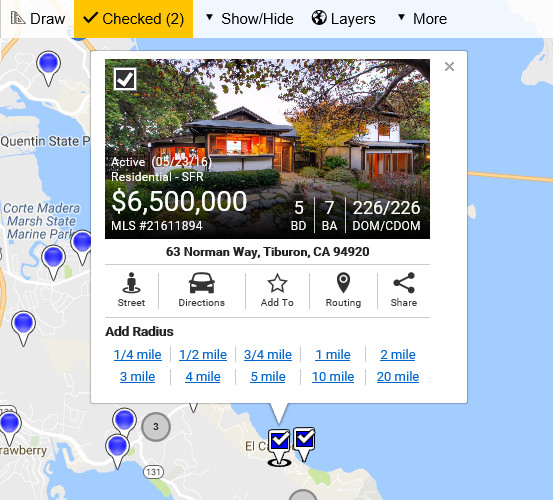
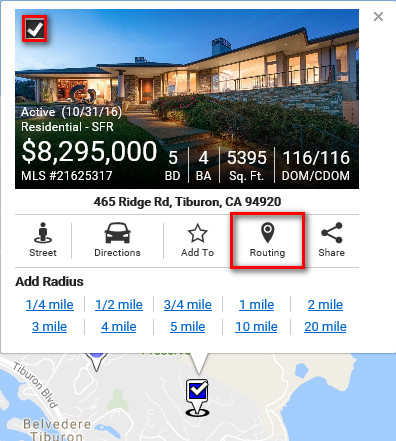
Listing Card: Clicking on a listing pin will display the listing card with the primary listing photo, selected listing information, and the following additional options:

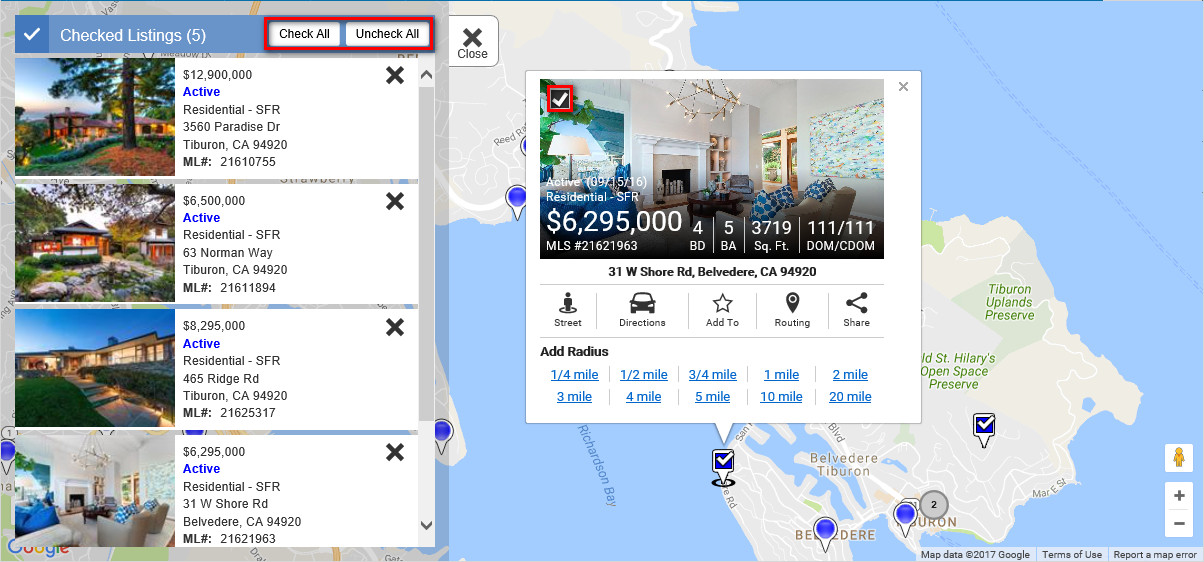
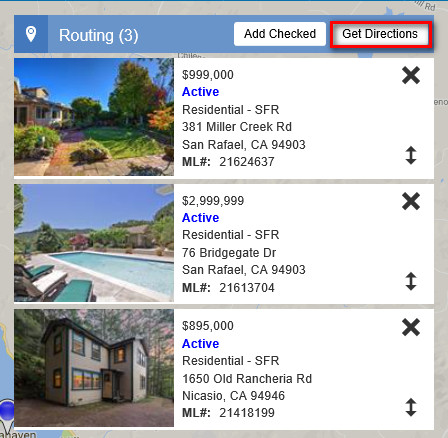
Checked Listings: To check a listing, click the check box in the upper-left corner of the primary listing photo on the listing card. Once checked, you can click the “Checked” button in the map toolbar to access the listing(s). Please note that listings will display in the order that they were checked and will continue to show on the map until they are unchecked, even if criteria is modified that would exclude them.
The “Check All” button in the “Checked Listings” panel allows you to select all listings currently viewable on the map. Clicking the “Uncheck All” button will deselect all checked listings. Note that if over 1,000 listings are shown on the map, you will need to zoom in or refine the search criteria to check all listings.
Map Layers: The map layers option allows you to apply one or more of the available map layers. The Layers panel contains standard layers based on MLS listing data as well as any custom map layers available in your individual MLS market.
Using the Layers feature
 button to expand the headings and check the box for the desired layer. Please note that if you see an
  icon instead of a check box, clicking the icon will automatically zoom in to the required level and open the layer.
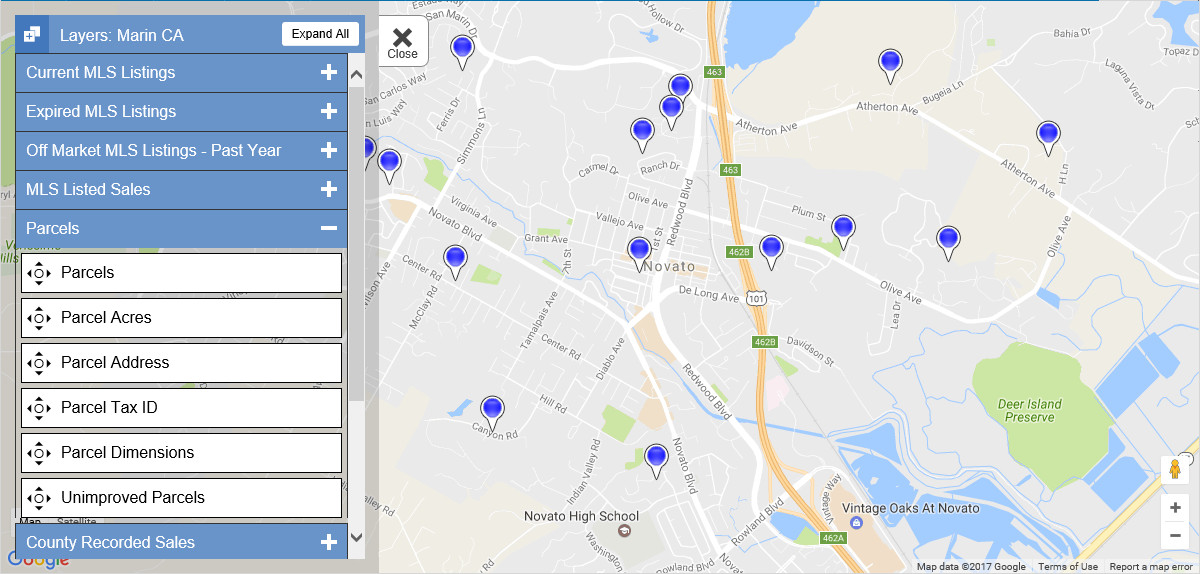
Parcel Mapping: On MLS sites which have Parcel Mapping available, you can click the Parcels option in the Layers panel to work with parcel data. When this layer is enabled, you can click on a parcel to access the parcel tooltip showing a property image, owner’s name, and mailing address as well as links to tax information, property history, and a property report. Please note that Parcel Mapping is only available in certain MLS markets.
Routing: You can route directions to listings, markers, or any location on the map.
Add a single listing to the route – Click a listing pin to display the listing card and click the “Routing ” button.
Add multiple listings to the route – Check all of the desired listings that you want to route by clicking the check box on the listing cards. Once you have checked all of the listings you want, click the “More” button in the map toolbar and select the Routing option. After the Routing panel opens, click the “Add Checked” button.
View the route – Click the “Get Directions” button in the Routing panel to automatically send the route to Google Maps for turn-by-turn directions via your web browser or mobile app.
Reorder stops – Simply hover over the  icon and drag and drop stops in the Routing panel to change the order.
Remove stops – Click the  icon next to a stop in the Routing panel to remove it from the route.
Measurement Tool: You can measure distances on the map.
Click the “More” button in the map toolbar and select the Measure option.
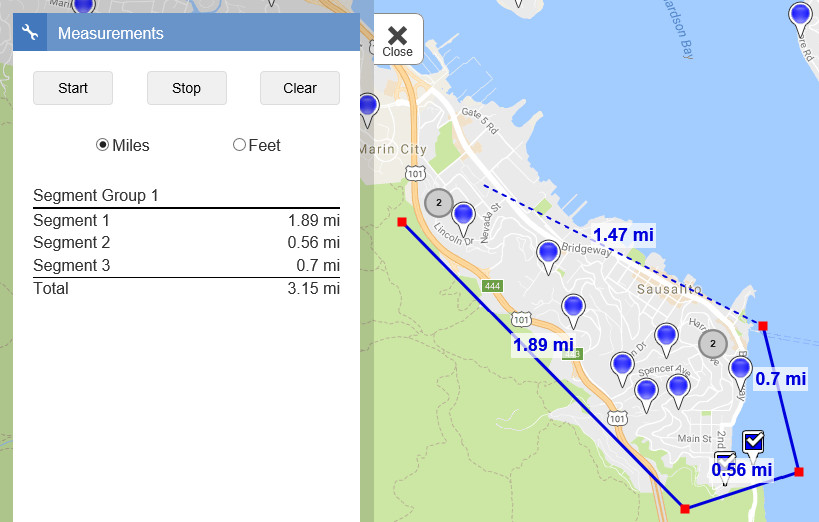
From the Measurements panel, click the “Start” button and click the location on the map where you want your measurement to begin. Continue clicking locations on the map until you have identified all desired segments, then click the “Stop” button.
Measurements for each segment, as well as a total, display on the fly in the Measurements panel. You can view the measurements in miles or feet; simply select the appropriate radio button.
Click the “Clear” button to remove all segments from the map.
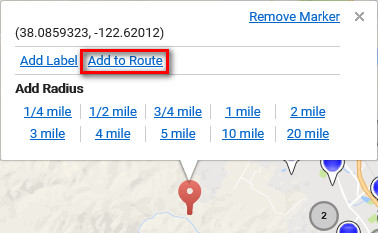
Markers: You can add markers on the map to indicate specific points including addresses, points of interest, or any other desired location. The marker text can be customized and can also be leveraged by the Routing feature to create driving directions.
Add a marker – Use the Location Search or right-click anywhere on the map to add a marker directly on the map. Click the “Add Label” link to name the marker if desired.
Remove a marker – Click the “Remove Marker” link on the marker tooltip to remove individual markers.
Add a marker to the route – Click on a marker to open the marker tooltip and click the “Add to Route” link. The location of the marker is added to the Routing panel. Please note that you can use this method to add any location on the map to a route.
Draw Controls: The “Draw” button in the map toolbar lets you select a drawing tool for the map. You can draw multiple shapes and choose to include or exclude listings once the shapes are created.
Using the Rectangle selection tool
Using the Area selection tool
Using the Radius selection tool
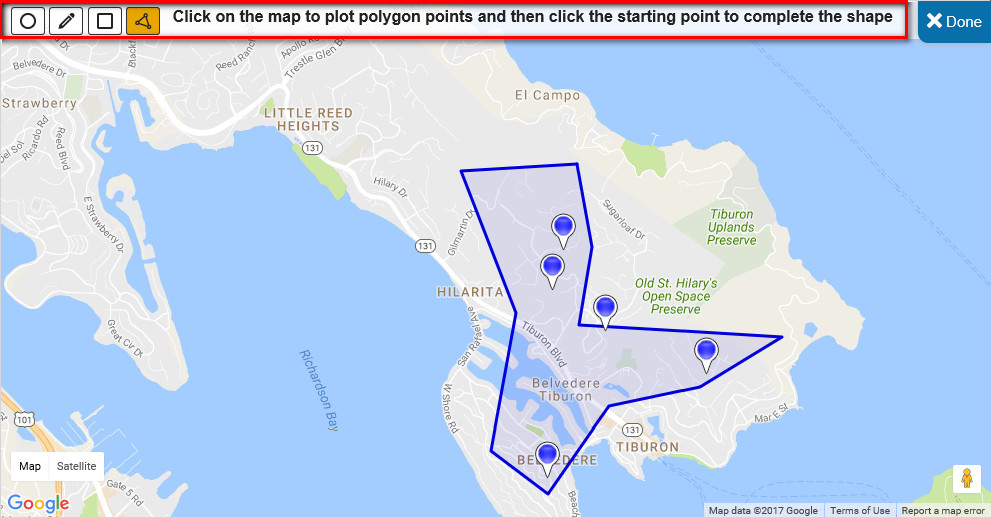
Using the Polygon selection tool
If desired, you can specify other criteria by clicking the "Search Criteria" button once you have drawn your shape(s) on the map.
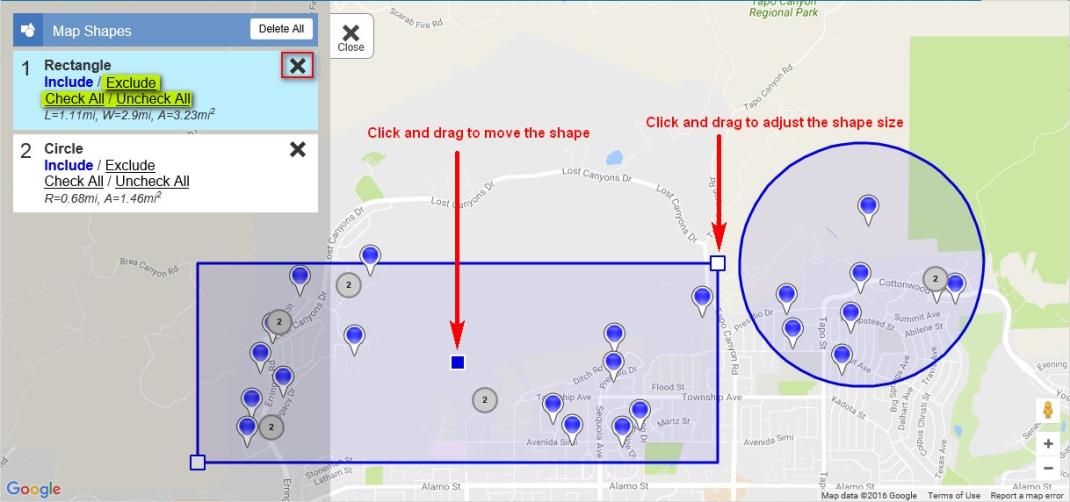
To edit or remove shapes, click the “Edit” button in the map toolbar. Using the “Map Shapes” panel, click the “X” icon to remove an individual shape or click the “Delete All” button to remove all shapes.
For individual shapes, you can choose to Include/Exclude, Check All, or Uncheck All listings located within the shape.
To edit an existing shape, click anywhere inside the shape to highlight all available points. Click and drag the desired point(s) to the new location. Note that when creating a shape, the dimension values and square miles will display and will automatically update when the shape is modified.
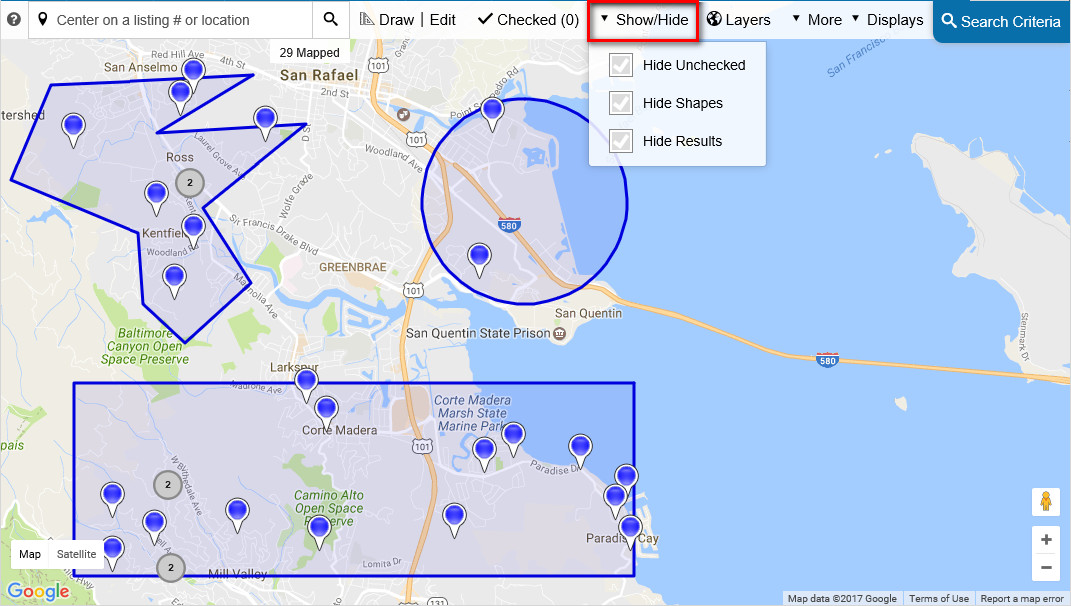
Show/Hide Controls: The "Show/Hide" button in the map toolbar provides the following check-box options:
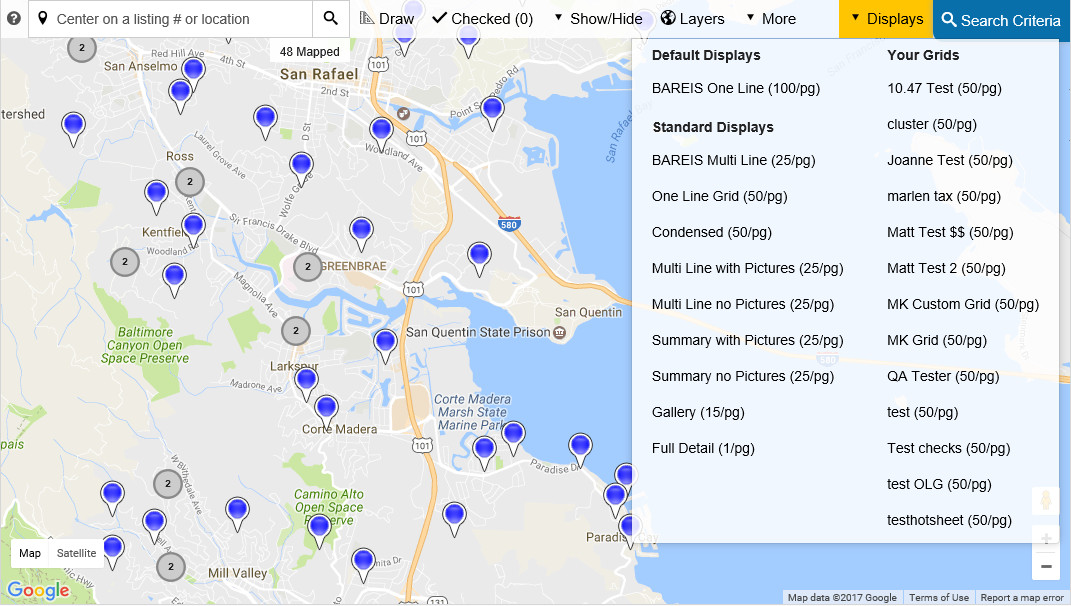
Displays: Clicking the “Displays” button in the map toolbar allows you to toggle between the Interactive Map Search and the MLS’s Search Results displays and grids.
Note that when switching from the Interactive Map Search to Search Results displays or grids, all listings currently shown on the map will be displayed regardless of whether they are checked or not.
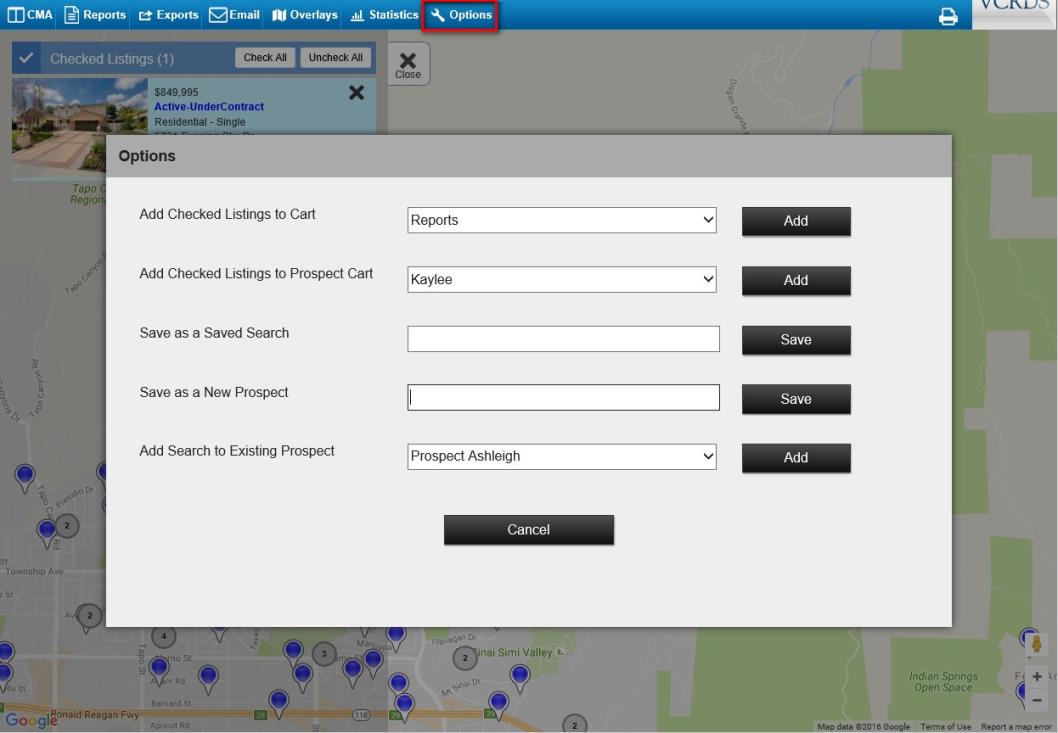
Options: The “Options” button in the MLS toolbar provides the following options for saving searches and adding listings to carts:
IMPORTANT: Any searches saved in the Interactive Map Search will be available in both the Desktop MLS and Edge MLS, and any Map Searches saved using the legacy map search will still be available as well.
NOTE: Listings with addresses that could not be validated during listing input and have not had their map location manually selected will not appear in the Interactive Map Search results.
TIP:  Click here to view new video tutorials for the Interactive Map Search feature or view other video tutorials under the "The Basics of Searching" section on the Learning Center. The Learning Center can also be accessed directly from the Help menu.
![]()